Exams#
An exam is a collection of questions which you will give to your students. Within an exam you can set a pass mark, as well as configure how much feedback students can receive and how they can navigate between questions.
For a quick introduction to the workflow involved in putting an exam together, see the tutorial on creating an exam.
Creating an exam#
To create an exam from any page in the Numbas editor, click on the plus icon at the top of the page, and select Exam.
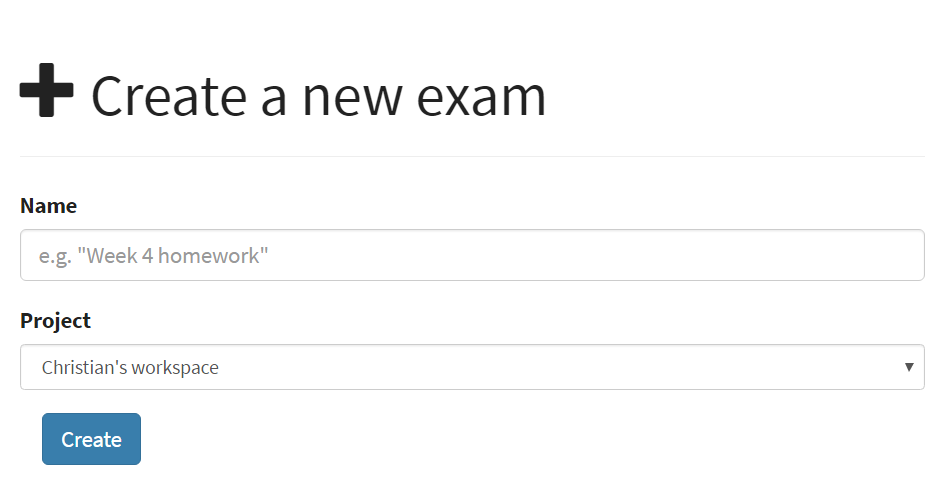
You must give a name for your exam, and select a project for it to go in. The default project is your personal workspace; you can always move the exam to another of your projects later on.
The exam editor#
At the top of the exam editor is the exam’s name, as well as a stamp showing the status of the exam.
Click on the status stamp to give feedback about the quality of an exam, after running it. The options are listed in descending order of “suitability for use”:
Ready to use - this exam is of sufficient quality to give to students.
Should not be used - this exam works, but you deprecate its use - for example, if it’s not intended for use by students, or there’s a better version elsewhere.
Has some problems - this exam works, but has some problems which mean it’s not ready for use by students - for example, the exam is incomplete, or changes need to be made to the text. Further work is needed before this exam can be given to students.
Doesn’t work - this exam doesn’t even run!
Needs to be tested - this exam looks alright to me, but it should be checked thoroughly before being used.
On the left of the screen are Admin controls and labels for each of the editing tabs.
Admin controls#
- Run#
Opens a preview of the exam in a new window.
Warning
Do NOT use this link to deliver the exam to students. This link is not permanent and could stop working at any time. Instead, either download the exam and put it on your own webspace or in a VLE, or use the Share button on the preview to obtain a permanent link.
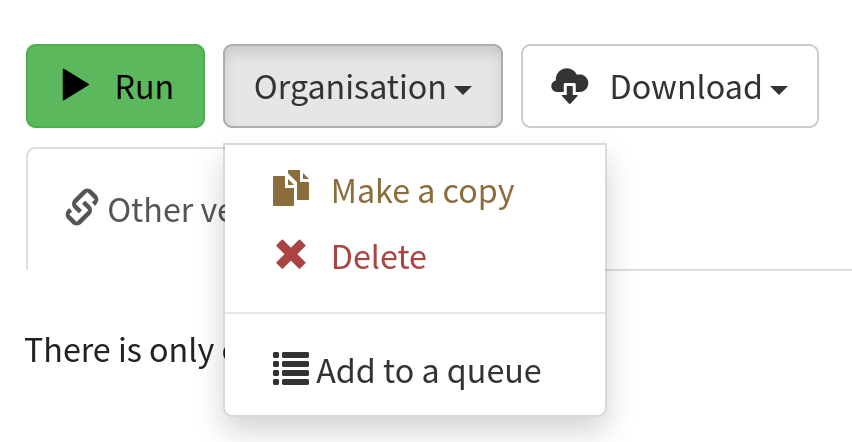
- Organisation#
Actions to organise this exam in the editor database.
- Make a copy
Create a copy of the exam. Use this to make changes to an exam which does not belong to you.
- Delete
Delete the exam permanently from the database. The associated questions are not deleted - you must delete them individually, if you want them to be deleted too.
- Add to a queue
Add this exam to a queue.
- Analyse attempt data
This action is only available when Allow the student to download their attempt data? is turned on.
- Download#
Links to download standalone packages of the exam.
SCORM package - a compiled package of the exam with SCORM files included, so it can be uploaded to a VLE and communicate with its gradebook.
standalone .zip - a compiled package of the exam, ready to run anywhere without connecting to a VLE.
source - a plain-text representation of the exam, to be used with the Numbas command-line tools or as a backup.
Questions#
Select the questions you want to include in your exam on this tab.
Questions are organised into groups. For each group, you can decide how many of the available questions to show to the student, and the order they should appear. You can use every question selected, or pick a random subset each time the exam is started.
- Show group names to student?#
If this is ticked, the names you give to each group of questions will be shown to the student in the navigation menu when they run the exam, and in the score breakdown at the end of the exam.
- Shuffle question groups?#
If this is ticked, the question groups will be shown to the student in a random order.
- Questions to use#
The strategy for picking questions to show to the student.
All questions, in this order - all of the questions in the list below are shown to the student, in the order you’ve chosen.
All questions, in random order - all of the questions in the list below are shown to the student, in a different order for each attempt.
Pick a random subset - A subset of the questions in the list below are shown to the student. The questions chosen, and the order they appear, will differ for each attempt.
- Number of questions to choose#
If using the “Pick a random subset” strategy, this many questions from this group will be shown to the student.
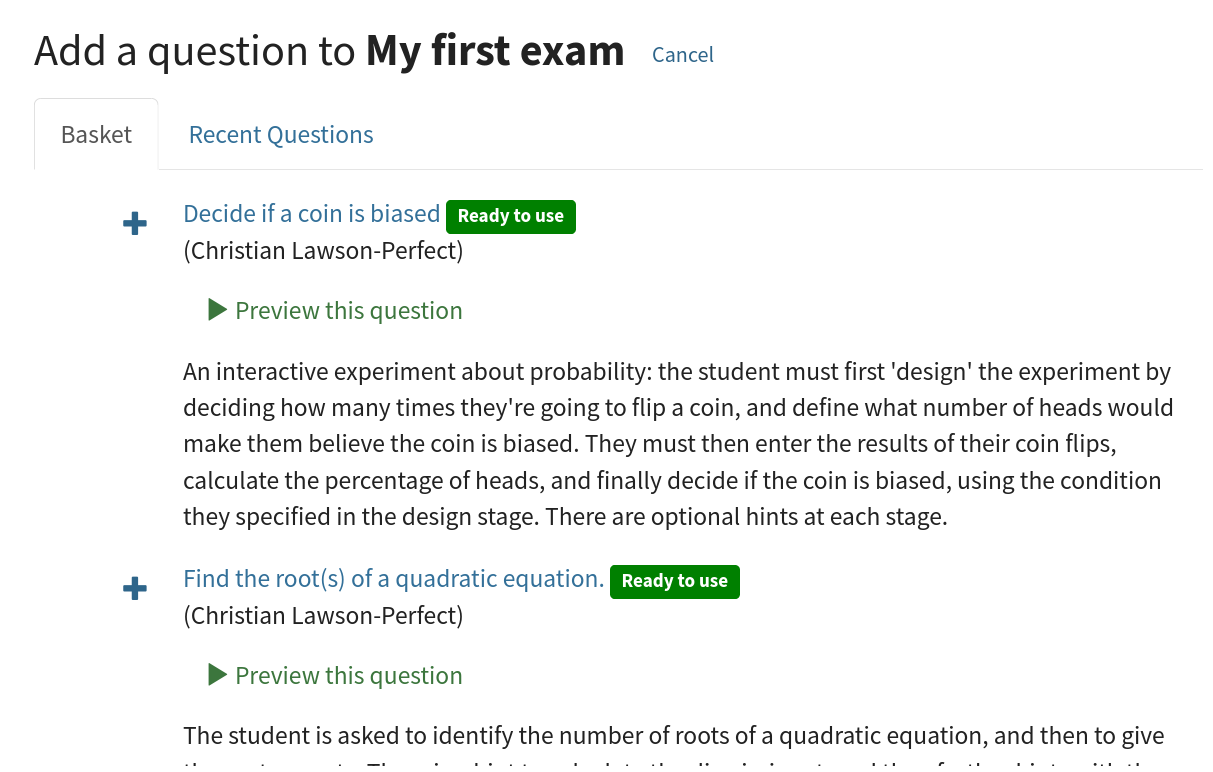
Click Add a question to this group to add a question to the current group.
The Basket tab shows questions you’ve added to your basket: you can browse the question editor to find questions, add them to your basket, and then go back to the exam editing page and add them in.
The Recent questions tab shows questions you have recently edited.
You can check a question does what you want and give it a test run before including it in your exam: click on the question’s name to open its editing page in a new window.
Click the plus icon on one of the question results to add it to your exam.
Once you’ve added some questions to your exam, you can drag and drop questions in the list to reorder them, or move a question to another group by dropping it on the list on the left-hand side.
Adding questions to an exam and rearranging them.#
You can give a question a custom name, which will be shown to the student. In the “Sequential” question navigation mode, questions with custom names are not numbered and do not affect the numbering of other questions in the exam.
Click the pencil icon labelled Edit this question to edit an individual question.
The Replace this question with a copy button lets you quickly swap in a duplicate of a question you’ve included in your exam. If you’re using a question created by someone else, this is a convenient way of getting a version of the question you can make changes to.
If the question has any variables whose values can be overridden, then you can give values for those variables here. The Value field should contain a JME expression for the desired value of the variable.
Note
Removing a question from an exam does not remove it from the database. To permanently delete a question, click on its name to open its edit page, and click the Delete button there.
Display#
- Interface theme#
Themes control the user interface of an exam, changing the look and feel. The default theme is designed for exams which will be delivered over the web. There is also a worksheet theme which can be used to print out multiple, randomised copies of an exam for students to complete on paper.
- Interface language#
Specify which translation to use for the text in the user interface, i.e. button labels, error messages, etc.
- Allow students to print their transcript?#
If this is turned off, the student will not be shown a button to print a transcript of the exam. You can control whether the printout contains the content of questions with the Show questions in printed results summary? option.
- Show student’s name?#
If ticked, the student’s name is shown on the results page after the exam has finished. The student’s name is only available when running the exam through a VLE - exams run standalone do not know the student’s name.
Feedback#
The Feedback tab contains a table determining when certain kinds of feedback are shown to the student.
There are four timing options:
- Always#
This feedback is always shown to the student.
- In submitted mode#
This feedback is only shown to the student once the exam has ended. It is also shown when the student re-enters the exam in review mode.
- Only in review mode#
If Enter review mode immediately on ending the exam? is not ticked, then this feedback is only shown once the student re-enters the exam in review mode. If it is ticked, then this feedback is also shown as soon as the exam ends.
- Never#
This feedback is never shown to the student.
Here are the kinds of feedback that can be controlled:
- Show answer correctness#
After the student enters an answer, an icon will be displayed to let the student know if their answer was marked correct, partially correct or incorrect.
- Show the student’s score#
The student will be shown their score for each question and part.
- Show the maximum score#
The student will be shown the maximum attainable score for each question and part.
- Show part feedback messages#
After the student enters an answer, they will be shown any feedback messages for each part.
- Show expected answers#
The student will be shown the expected answer for each part.
- Show question advice#
The student will be shown the Advice section for each question.
These are the other settings in the Feedback tab:
- Enter review mode immediately on ending the exam?#
If ticked, then as soon as the exam ends, it will enter review mode. If not ticked, then once the exam ends it will enter “submitted mode”. The “review mode” feedback settings will only be applied when the student re-enters the exam in review mode.
- Pass threshold#
Define a pass/fail threshold for the student’s total score, as a percentage of the available marks. The pass/fail message will be displayed when the student ends the exam. If this is set to zero, then no message is displayed.
- Feedback messages#
You can write a list of messages, paired with threshold percentages, to show to the student at the end of the exam. The student’s score is calculated as a percentage, rounded to the nearest 1%, and compared with the thresholds for each message. The message with the largest threshold less than or equal to the student’s score is displayed.
You could use these messages to suggest topics for the student to revise, direct them to support resources, or detail the consequences of failing the test.
Events#
Some of the properties described above are marked as events. These all have the same structure: an Action setting which determines how to react to the event, and a Message to display to the student when appropriate.
Settings#
The settings tab is where you set up metadata describing the exam.
Try to make sure not to ignore the settings tab, even if you just want to get a working exam as quickly as possible - a good name and description will make it much easier to find your exam again in the future!
- Name#
This is shown to the student and used for searching within the editor, so make it something intelligible. “Linear algebra diagnostic test” is a good name; “L.A. t1 v1” is not.
- Description#
Use this field to describe the exam’s contents, what it assesses, and so on. This is shown in the exams index, so make sure it’s fairly concise.
- Tags#
Use tags to categorise exams so they can be found through the search function. Your guiding principle should be “more is better” - try to write down all words that someone searching for this exam might use.
After typing a tag in the box, press the Enter key to add it to the list.
Metadata#
- Transfer ownership#
Click this button to transfer ownership of the exam to somebody else. You will be given editing access automatically, but the new owner can revoke this.
- Move to another project#
Click this button to move the exam to another project. You can move an exam to any project to which you have editing access.
- Licence#
You can specify the licence under which you are making your resources available. Different licences allow other users to copy, modify or reuse your content in different ways - consider which licence to choose carefully. CC BY allows other users to reuse your content however you like, as long as they give appropriate credit to you.
- Subjects and Topics#
The Subjects and Topics fields provide a more structured way to categorise exams according to the subjects they assess. Database search results can be filtered by subject or topic.
Once you have selected one or more subjects, topics belonging to those subjects appear underneath.
The options for these fields are defined by the server administrator.
- Ability levels#
Use this field to describe which ability levels the exam is appropriate for.
Several ability frameworks are available to choose from - pick the framework which most closely matches your own, and select one or more ability levels. An ability level is modelled as an interval in the range 0 to 1, so when you filter database search results by ability level, any items whose ability levels overlap the ones you selected are included in the results.
The options for these fields are defined by the server administrator.
Access#
You can control who is allowed to see, and to edit, your exams.
When you create a new exam, access is limited to you and any other members of the project the exam belongs to. You can grant extra access to indvidual users or publish your exam to the public database, where it can be viewed by any other user.
- Give access to a user
Type a name into the search box to find a user. Click on a user’s name in the results list to add them to the access list.
Named users can have the following rights:
- Access Links
The URLs in this section automatically grant access to whoever follows them. You could use these links to share a question with someone who hasn’t yet created an account on the editor (they’ll be prompted to create an account when they click on the link), or to share a question with a group of people without inviting each person individually.
Warning
These URLs grant access to whoever clicks on them, so be careful about how they’re shared.
Other versions#
In this tab you can see all exams which are related to this one. Exams are related if one is a copy of the other, or they are both copies of a common ancestor. You can use this tab to compare the current exam with related versions, and offer to merge your version of the exam into another.
Click on the Compare link to go to a screen where you can offer to replace the other version with your version, or vice versa. If you have editing access to the destination exam, you can replace it with the other version automatically. If you don’t have editing access, the owner of the exam will be sent a Request to merge, which they must accept before the exams are merged.
Before creating the request, you’ll be asked to describe how your version differs from the one you want to replace. Try to sum up all your changes - this will show up in the exam’s editing history if your request is accepted.
Warning
If the exam you want to replace has changed since you made a copy of it, those changes will be lost if the request to merge is accepted - the exam is completely overwritten with the new version.
You can always restore an old version of an exam after a merge, by clicking on the appropriate restore link in the Editing history tab.
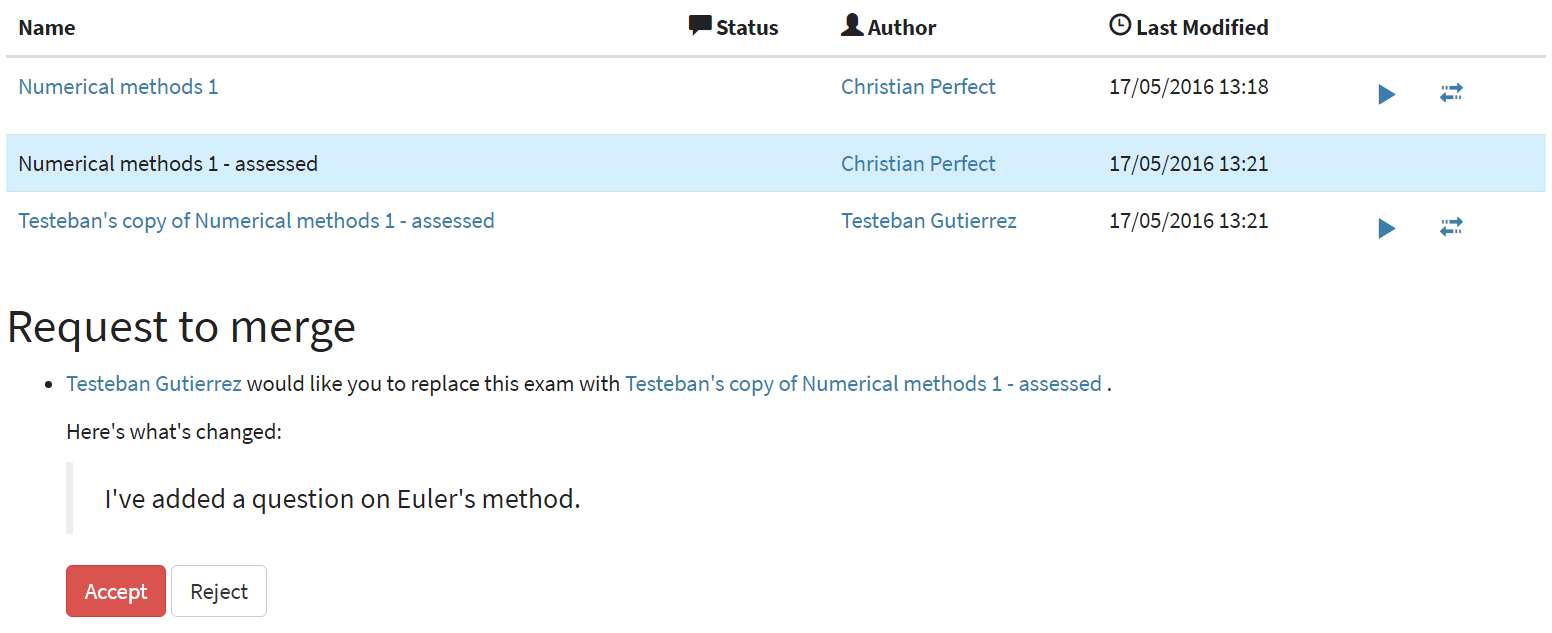
Active requests to merge other versions into the current exam are shown underneath the list of related versions. You can accept the request, in which case your version will be replaced with the other version, or reject it, in which case your version will be unchanged and the person who made the request will be notified that it was rejected.
Editing history#
Use this tab to keep a record of changes made to your exam. Write comments to discuss problems or suggested changes.
The Contributors list shows everyone who has made a change to this exam. This list is included with the exam when you download it, and if you re-upload this exam to an instance of the Numbas editor.
Each time you make a change to an exam, it’s saved to the database. To save a snapshot of the current state of the exam, click the Set a checkpoint button. You’ll be asked to write a description of the exam as it stands - describe what you’ve changed since the last snapshot, and why you’re making a snapshot.
To restore a checkpoint, click its Restore button. The current state of the exam will be overwritten with the saved state.
Other activity on this exam will also be shown in this tab: for example, each time somebody uses the Feedback button to provide feedback on this exam, an entry is added to the editing history.